Quick Fixes for a Smart Fridge Ice Maker Not Making Ice
I know how frustrating it is when your smart fridge stops making ice — this concise UK DIY guide helps you find and fix common causes, protect warranties, includes UK-specific long-tail keywords and image-size tips.
Tools, Parts & Skills You’ll Need
Screwdrivers, adjustable spanner, multimeter, bucket, towels; replacement water filter, distilled water, cosy gloves; basic DIY skills; isolate power/water; feature image 1200×800; keyword “smart fridge ice maker not making ice UK”.

Step 1 — Check Power, Settings and Water Supply First
Have you checked the obvious? A stubborn setting or loose water line is often the culprit.Start with the simplest checks. Confirm the fridge is plugged in and powered. Confirm the ice maker is switched on — many models use a metal arm or a small toggle; flip it into the “on” position. Confirm the freezer temperature is at or around -18°C; set it colder if it’s higher.
Inspect the external water supply and inlet line. Ensure the water valve under the sink or by the stopcock is fully open and the flexible hose to the fridge is not kinked or crushed. If your smart fridge uses an app, check the ice-maker setting — look for paused, vacation mode, or scheduled off times.
Quick examples:
Search online with long-tail keywords like “smart fridge ice maker not making ice UK” or “how to fix smart fridge ice maker UK” for model-specific tips. Use a high-quality feature image (1200×628 px) showing the ice tray and inlet valve for documentation. These basic checks fix many ‘no ice’ complaints quickly.

Step 2 — Inspect and Clean the Ice Maker Assembly
A dirty tray or frozen clamp? Cleaning can be faster than buying parts.Turn off power at the fridge and isolate the water supply. Remove the ice bin and inspect the mould for blockages, frost build-up or fused ice.
Defrost stubborn ice by leaving the freezer door open with towels underneath, or dab with a warm (not boiling) cloth. Avoid using sharp tools or metal implements that can damage the tray.
Clean the tray, ejector blades and sensors with warm distilled water and a mild detergent or a 1:1 white vinegar solution to remove limescale. Rinse thoroughly and dry with a soft cloth.
Reassemble carefully, restore water and power, then run a discard cycle or make two batches to clear lines. Many smart fridge ice makers resume normal behaviour after a thorough clean. Use a high-quality feature image (1200×628 px) showing the ice tray and inlet for documentation.

Step 3 — Test and Replace the Water Filter and Supply Components
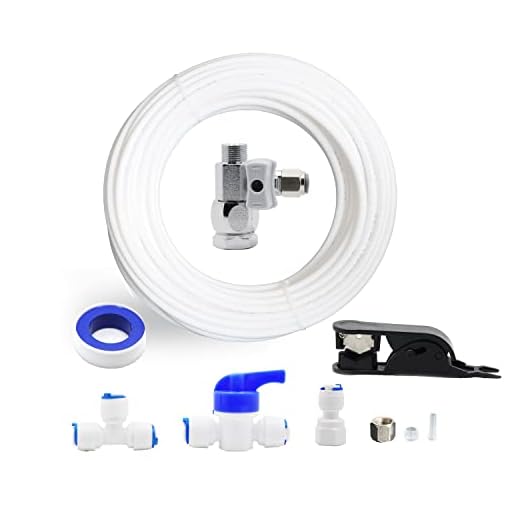
No water in = no ice — that simple. Could a cheap filter fix months of disappointment?Replace old or clogged filters with the correct UK-compatible replacement fridge water filter (check model/code). Fit the new filter and flush the system exactly as the manufacturer instructs to clear air and debris.
Inspect the water inlet valve during a fill cycle: listen for a click when the ice-maker or water dispenser runs. If silent or weak, test the valve solenoid with a multimeter — no continuity (infinite) means the solenoid needs replacing. If unsure, example: trigger the ice fill and have someone watch/listen while you operate the dispenser.
Check supply tubing for kinks, pinches or freezes in the door or under the freezer. Thaw frozen tubing gently (warm cloth or hairdryer on low) and ensure a smooth, uninterrupted flow.
Use a high-quality feature image (1200×628 px) showing the new filter, inlet valve and tubing to document parts before and after replacement.

Step 4 — Diagnose Electrical, Sensors and Smart Features
Is your smart fridge ghosting you? Sensors, software, or a rogue firmware update might be to blame.Power-cycle the fridge and reopen the manufacturer app. Check for error codes and firmware updates that can fix smart ice-maker issues (search long-tail keyword: “smart fridge ice maker not making ice UK firmware update”).
Reset the ice maker using the unit’s test cycle — consult the manual for the exact button sequence. For example, hold the ice-maker or control-panel button for 10–15 seconds to start a diagnostic cycle on many models.
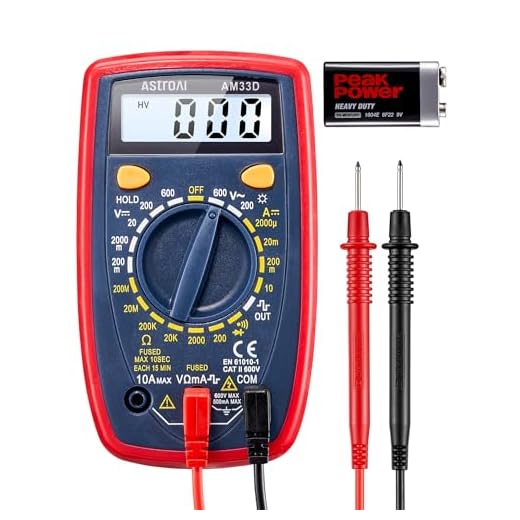
Test thermistors, temperature sensors and ice-maker heaters with a multimeter. Compare readings to the manual’s specs (e.g. some thermistors read ~10kΩ at 25°C). Record results and retest after a power-cycle.
Inspect wiring harnesses and connectors for corrosion, water intrusion or loose pins. Wiggle each connector gently while watching for intermittent faults during a test cycle.
Use a high-quality feature image (1200×628 px) showing a multimeter on sensors and the control board to document diagnostics.
If the control board is faulty or there’s water damage, contact an authorised UK engineer — DIY board swaps can void warranties and risk electrical hazards.
Step 5 — Final Tests, Replacement Parts and UK SEO & Image Tips
Fix, test, then document — plus pro tips on long-tail keywords and a perfect feature image for UK readers.Run a full test cycle after reassembly. Observe the fill, freezing and eject phases over a few hours — listen for the inlet valve click, watch the tray fill, check freeze progress and confirm the eject arm drops ice into the bin. For example, start a diagnostic at 8pm and check results in the morning.
If unsuccessful, identify common replacement parts:
Source UK-authorised spares from manufacturer parts pages or reputable suppliers (Appliance Spares, authorised dealers). Match your fridge model and serial number. Isolate the water supply before fitting parts.
Optimise your article for UK readers by using long-tail keywords such as “how to fix smart fridge ice maker not making ice UK”, “DIY Samsung fridge ice maker repair UK” and “smart refrigerator ice maker troubleshooting in the UK”. Use British English, concise headings and local phrases like “isolate the water supply”.
Add a high-quality feature image (recommended 1200×800 px, JPG/PNG, alt text: “smart fridge ice maker repair UK”) to improve CTR.
Recap and When to Call a Professional
Follow the steps in order — many fixes are simple; try them and share results. If problems persist or you suspect sealed‑system/electrical faults, book an authorised UK engineer; preserve warranty.


