
This step-by-step guide provides a simple and enjoyable method for creating dairy-free ice cream using a Cuisinart Ice Cream Maker. It outlines the necessary ingredients, such as non-dairy milk and sweeteners, and details the process from mixing the base to churning and freezing the mixture. With clear instructions and tips, this guide ensures that anyone, regardless of dietary restrictions, can make a delicious, creamy dairy-free ice cream at home.

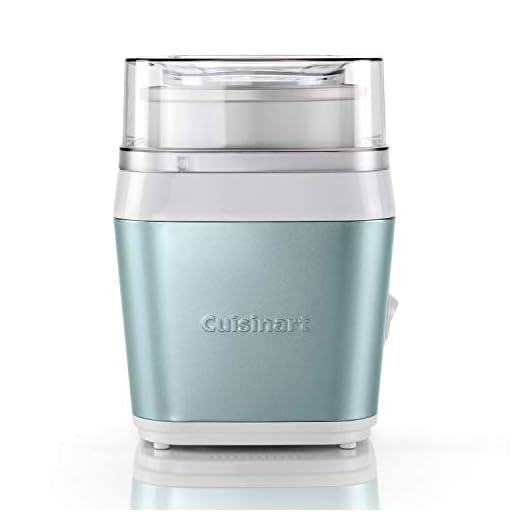

Gather Your Ingredients
Gather all the necessary ingredients for your dairy-free ice cream. Choose a base like coconut milk, almond milk, or cashew cream, ensuring it’s unsweetened for better control over flavor. Select your sweeteners, such as maple syrup or agave nectar, based on your preferred level of sweetness. Add flavorings like vanilla extract for a classic taste or cocoa powder for a rich chocolate option.
Measure each ingredient carefully to maintain the desired consistency and flavor. Keep the ratios balanced; typically, use a 2:1 ratio of liquid base to sweetener. Prepare any mix-ins, like fruits or nuts, that you might want to add later. Organize everything on your countertop to streamline the mixing process and ensure you have everything within reach.


Prepare the Ice Cream Base
Combine your chosen dairy-free milk, sweetener, and flavorings in a mixing bowl. Whisk the ingredients together thoroughly until everything is fully incorporated, ensuring that the sweetener dissolves completely for a smooth mixture. If you desire a richer texture, add a scoop of nut butter or a handful of soaked cashews into the bowl. Blend these additional ingredients into the mix until they are fully integrated, creating a creamy base that enhances the overall flavor and consistency of your ice cream.
Chill the Mixture
Chill the ice cream base by covering it securely with plastic wrap or a lid. Place the covered mixture in the refrigerator for a minimum of 1-2 hours. This chilling period allows the ingredients to meld together and cool evenly, which is essential for achieving a smooth and creamy texture once you start the freezing process. The colder the mixture is when it enters the ice cream maker, the less ice crystals will form, resulting in a more enjoyable final product.
Check the temperature of the base before proceeding to churn it. Ideally, it should be around 40°F (4°C) or colder. If you find that it hasn’t chilled sufficiently, leave it in the refrigerator for an additional 30 minutes. Remember, patience during this step pays off with a better texture and flavor in your homemade ice cream.
Prepare the Cuisinart Ice Cream Maker
Place the freezer bowl in the freezer for at least 24 hours before starting to make ice cream. Ensure the bowl is completely frozen by checking that the liquid inside has solidified. This step is crucial, as a well-frozen bowl will help the ice cream mixture churn properly, resulting in a creamy texture.
Assemble the Cuisinart Ice Cream Maker according to the manufacturer’s instructions. Start by placing the frozen bowl onto the base of the machine, ensuring it fits securely. Next, attach the mixing paddle and lid properly. Confirm that all parts are locked in place to avoid any leaks during the churning process. Once assembled, you’re ready to pour in your prepared ice cream mixture and start the machine.
Pour the Mixture into the Ice Cream Maker
Pour the chilled dairy-free ice cream base into the bowl of the Cuisinart Ice Cream Maker. Ensure that the mixture is well-mixed and free of any lumps before you start pouring. This step is crucial, as a uniform consistency will lead to a smoother texture in the final product. Carefully fill the bowl, keeping an eye on the maximum fill line indicated on the machine. Avoid exceeding this line to prevent overflow during the churning process, which can create a mess and disrupt the ice cream’s formation.
Once the mixture is in the bowl, securely attach the lid of the ice cream maker. Make sure it is fastened properly to prevent any spillage. Turn on the machine and let it churn according to the manufacturer’s instructions. While the ice cream is churning, you might notice the mixture slowly thickening and taking on a creamy texture. This is an exciting part of the process, as you can anticipate the delightful treat that awaits you.
Churn the Ice Cream
- Turn on the ice cream maker, ensuring it is properly assembled and plugged in before starting.
- Allow the machine to churn the ice cream mixture for approximately 20-25 minutes.
- Monitor the process closely; check the consistency every few minutes.
- Observe the mixture as it thickens and begins to resemble soft-serve ice cream.
- Adjust the time if necessary, stopping the machine when the desired texture is achieved but before it becomes too firm.
- Be prepared to scoop and serve immediately, or transfer the soft ice cream to a container for further freezing if a firmer texture is preferred.
Freeze the Ice Cream
Transfer the churned ice cream into an airtight container. Ensure the container is clean and dry to prevent any contamination or freezer burn. Smooth the top of the ice cream with a spatula to remove any air pockets, which can create ice crystals and affect the texture.
Seal the container tightly, making sure there are no gaps for air to enter. Place the container in the coldest part of your freezer. Freeze for an additional 2-4 hours. This step is crucial for developing the ideal scoopable texture. During this time, the ice cream will firm up, allowing for easier scooping when it’s time to serve. Check the consistency before serving; it should be firm yet creamy, perfect for enjoying in bowls or cones.
Enjoy Your Creamy Creation!
In conclusion, making dairy-free ice cream in your Cuisinart Ice Cream Maker is not only simple but also a fun way to indulge in a healthier dessert option. With just a few ingredients and a bit of creativity, you can customize flavors and textures to suit your preferences. So go ahead, savor your homemade creation, and don’t hesitate to explore new combinations for a delightful treat every time!
Essential Ingredients & Equipment

Essential Hacks
Step-by-Step Guide to Crafting Delicious Homemade Ice Cream
- Gather Ingredients: Start by collecting all necessary ingredients, which typically include heavy cream, whole milk, sugar, and your choice of flavorings (like vanilla extract or cocoa powder)
- Prepare the Mixture: In a mixing bowl, combine the heavy cream, whole milk, sugar, and any flavorings. Whisk until the sugar is fully dissolved, and the mixture is smooth
- Chill the Mixture: For best results, refrigerate the mixture for at least 1-2 hours before churning. This helps improve the texture of the ice cream
- Set Up the Ice Cream Maker: Ensure the bowl of the Cuisinart ice cream maker is frozen solid (typically at least 24 hours in the freezer). Then, assemble the machine according to the manufacturer’s instructions
- Churn the Ice Cream: Pour the chilled mixture into the ice cream maker and churn for about 20-25 minutes or until it reaches a soft-serve consistency. If desired, add mix-ins like chocolate chips or fruit in the last few minutes of churning




I tried making this last weekend, and my mixture overflowed in the ice cream maker! Any tips on how to avoid this next time? I followed the steps but maybe I mixed too much?
Oh no! That can happen if the mixture expands too much while churning. To avoid overflow, try filling the ice cream maker only up to 2/3 full, and make sure to chill your mixture well before pouring it in. Hope that helps!
Just made my first batch using your guide! I went with a chocolate almond flavor, and it turned out AMAZING! Thanks for the tips; I never realized how easy it could be to make dairy-free ice cream at home!
That’s fantastic to hear! Chocolate almond is such a great combo. I’m so glad the guide helped you make your first batch—keep experimenting with flavors!
I love making ice cream! Have you ever tried adding avocado to the base? It makes the texture super creamy and adds a unique flavor. Just mash it up and mix it in with the other ingredients during step 2!
Thanks for your question! For the creamiest results, I recommend using a blend of cashew milk and almond milk. Cashew milk adds a nice creaminess, while almond milk keeps it light. Give it a shot and let me know how it turns out!
Hey, great guide! I was wondering if you have any tips on what dairy-free milk works best for making ice cream? I’ve tried coconut milk before, but it didn’t turn out as creamy as I expected. Any recommendations?
What other flavors do you suggest for dairy-free ice cream? I usually stick with vanilla, but I’m ready to get adventurous!
I would love to see a section on toppings! What are some fun dairy-free toppings you’d recommend? I’m thinking about experimenting with some homemade cookie crumble!
Great idea! Some awesome dairy-free toppings include crushed nuts, dairy-free chocolate chips, or even a drizzle of coconut caramel. Homemade cookie crumbles sound delicious—just make sure to use dairy-free cookies!